准备工作
操作系统:Debian 11
服务器配置: 1 CPU 1G Mem 10G Disk
为后续讲解方便,假设服务器IP为 192.168.1.1
开始搭建
安装python3以及python3-pip
apt install python3 && apt install python3-pip
拉取项目
git clone https://github.com/qsbaq/vpsand.com.git && cd vpsand.com
安装搭建所需的必要组件
cp vpsmonitor/settings_local.py vpsmonitor/settings.py
这一个步骤是为了修复运行提示 ModuleNotFoundError: No module named 'vpsmonitor.settings'
安装必要组件并导入数据库
pip3 install django && python3 manage.py makemigrations --merge && python3 manage.py migrate
创建管理用户
python3 manage.py createsuperuser
步骤如下
System check identified some issues:

WARNINGS:
vps.Company: (models.W042) Auto-created primary key used when not defining a primary key type, by default 'django.db.models.AutoField'.
        HINT: Configure the DEFAULT_AUTO_FIELD setting or the VpsConfig.default_auto_field attribute to point to a subclass of AutoField, e.g. 'django.db.models.BigAutoField'.
vps.Goods: (models.W042) Auto-created primary key used when not defining a primary key type, by default 'django.db.models.AutoField'.
        HINT: Configure the DEFAULT_AUTO_FIELD setting or the VpsConfig.default_auto_field attribute to point to a subclass of AutoField, e.g. 'django.db.models.BigAutoField'.
vps.Passwd: (models.W042) Auto-created primary key used when not defining a primary key type, by default 'django.db.models.AutoField'.
        HINT: Configure the DEFAULT_AUTO_FIELD setting or the VpsConfig.default_auto_field attribute to point to a subclass of AutoField, e.g. 'django.db.models.BigAutoField'.
vps.Subscribe: (models.W042) Auto-created primary key used when not defining a primary key type, by default 'django.db.models.AutoField'.
        HINT: Configure the DEFAULT_AUTO_FIELD setting or the VpsConfig.default_auto_field attribute to point to a subclass of AutoField, e.g. 'django.db.models.BigAutoField'.
Username (leave blank to use 'root'): root
Email address: root@root.root
Password:
Password (again):
Superuser created successfully.
Username Email地址 密码 按需填写
修改settings.py文件允许服务器IP进行访问
nano vpsmonitor/settings.py
找到 **ALLOWED_HOSTS** 这一项,并将其修改成如下内容后保存并退出

ALLOWED_HOSTS = ['192.168.1.1','127.0.0.1']

# 192.168.1.1修改为你自己服务端的IP
如果后续配置了反代服务,只需按需进行修改就可以了,此处为了方便就先用IP进行访问了
用nohup的方式运行程序
cd /root/vpsand.com && nohup python3 manage.py runserver 0.0.0.0:8558
端口根据个人需求进行修改,也可以通过systemctl实现开机自启动
配置定时监控/Crontab
*/5 * * * * /usr/bin/python3 /root/vpsand.com/manage.py run >> /root/vpsand.com/refreshing.log 2>&1 &
此处默认是5分钟进行一次监控,根据个人需求进行修改
添加监控项
输入 http://192.168.1.1/admin/ 进入服务器后台管理,如下图所示
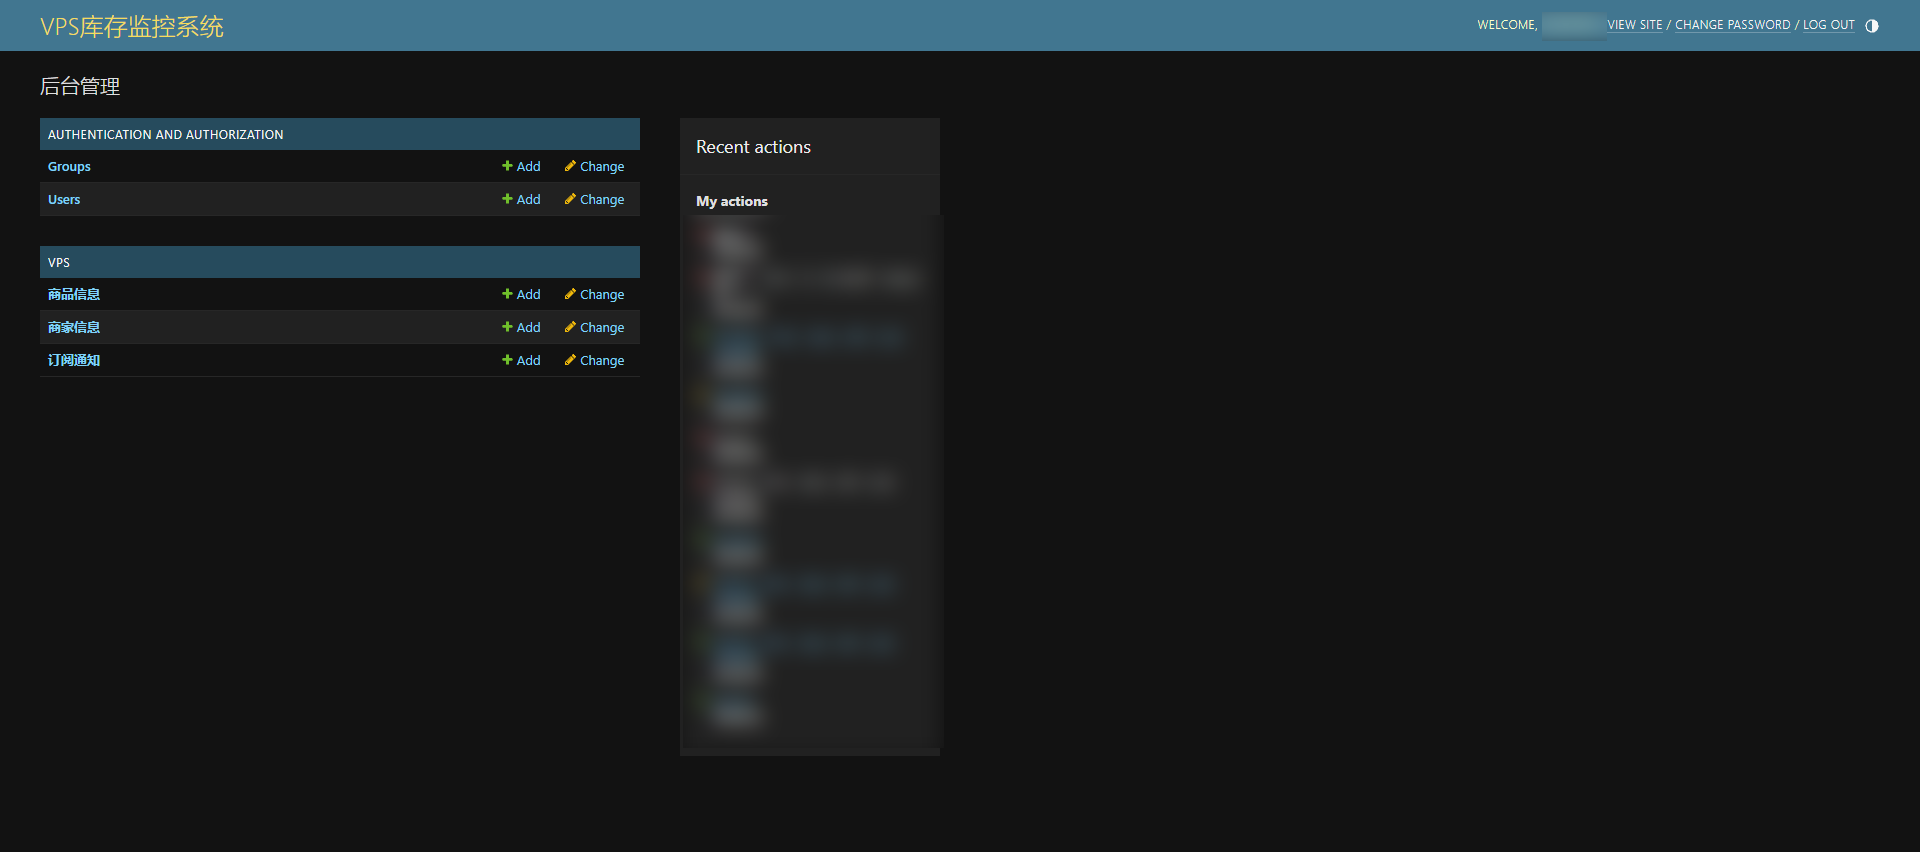
默认商品信息只有搬瓦工的模板,所以我们需要对其进行一下修改,此处以buyvm也就是frantech为例
首先需要确定你要监控的服务器是哪个产品,假设我要监控的产品为 Luxembourg - AMD RYZEN KVM
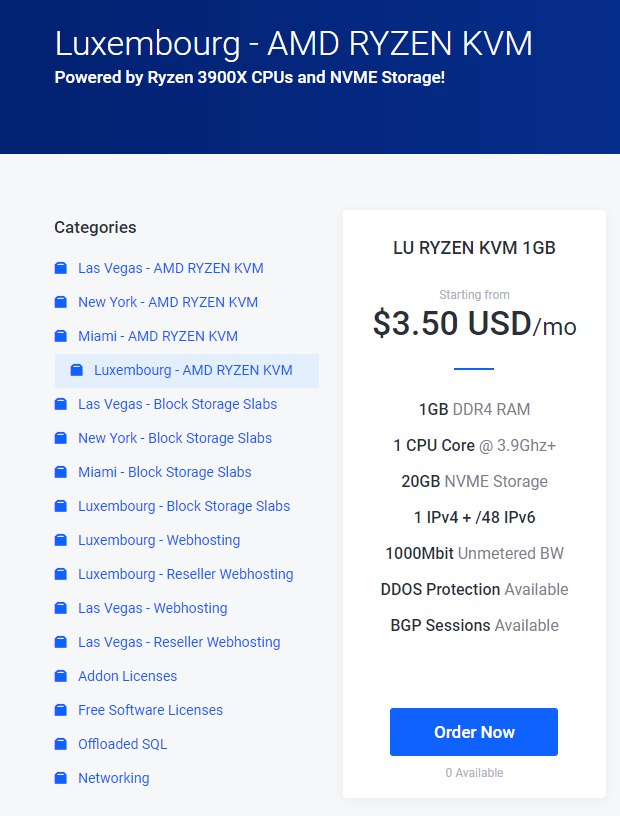
确认好地区以及配置后,回到服务器端进行修改
nano /root/vpsand.com/vps/models.py
按 Ctrl W 输入 lineChoices 找到以下相关配置
lineChoices = (
        ('CN2-GT','CN2-GT'),
        ('CN2-GIA','CN2-GIA'),
        ('BGP','BGP'),
        ('PCCW','PCCW'),
    )
我们在原有的基础上进行修改,这边我为了方便就暂定buyvm卢森堡为普通线路,所以修改后的配置如下
lineChoices = (
        ('CN2-GT','CN2-GT'),
        ('CN2-GIA','CN2-GIA'),
        ('BGP','BGP'),
        ('PCCW','PCCW'),
        ('普通线路','普通线路'),
    )
再找到 dcChoices 这个配置进行地区的修改,原配置如下
dcChoices = (
    ('ATL','ATL'),
    ('LA','LA'),
    ('SEA','SEA'),
    ('HK','HK'),
    ('Taiwan','Taiwan'),
    ('Frankfurt','Frankfurt'),
    ('China','China'),
    ('Overseas','Overseas'),
    ('Global','Global'),
 )
我们所选商品地区为卢森堡,根据个人需求进行修改,修改后如下所示
dcChoices = (
    ('ATL','ATL'),
    ('LA','LA'),
    ('SEA','SEA'),
    ('HK','HK'),
    ('Taiwan','Taiwan'),
    ('Frankfurt','Frankfurt'),
    ('China','China'),
    ('Overseas','Overseas'),
    ('Global','Global'),
    ('Luxembourg','Luxembourg'),
)
保存并退出后,我们重新运行一下服务端并回到管理后台进行商家以及商品信息添加
首先添加商家信息
获取监控连接,只需要点一下所监控商品的 Order Now (图2上面有写)
根据这篇文章所监控的商品可以获得以下链接 https://my.frantech.ca/cart.php?a=add&pid=1423
按需配置完成后,点击 SAVE 进行保存
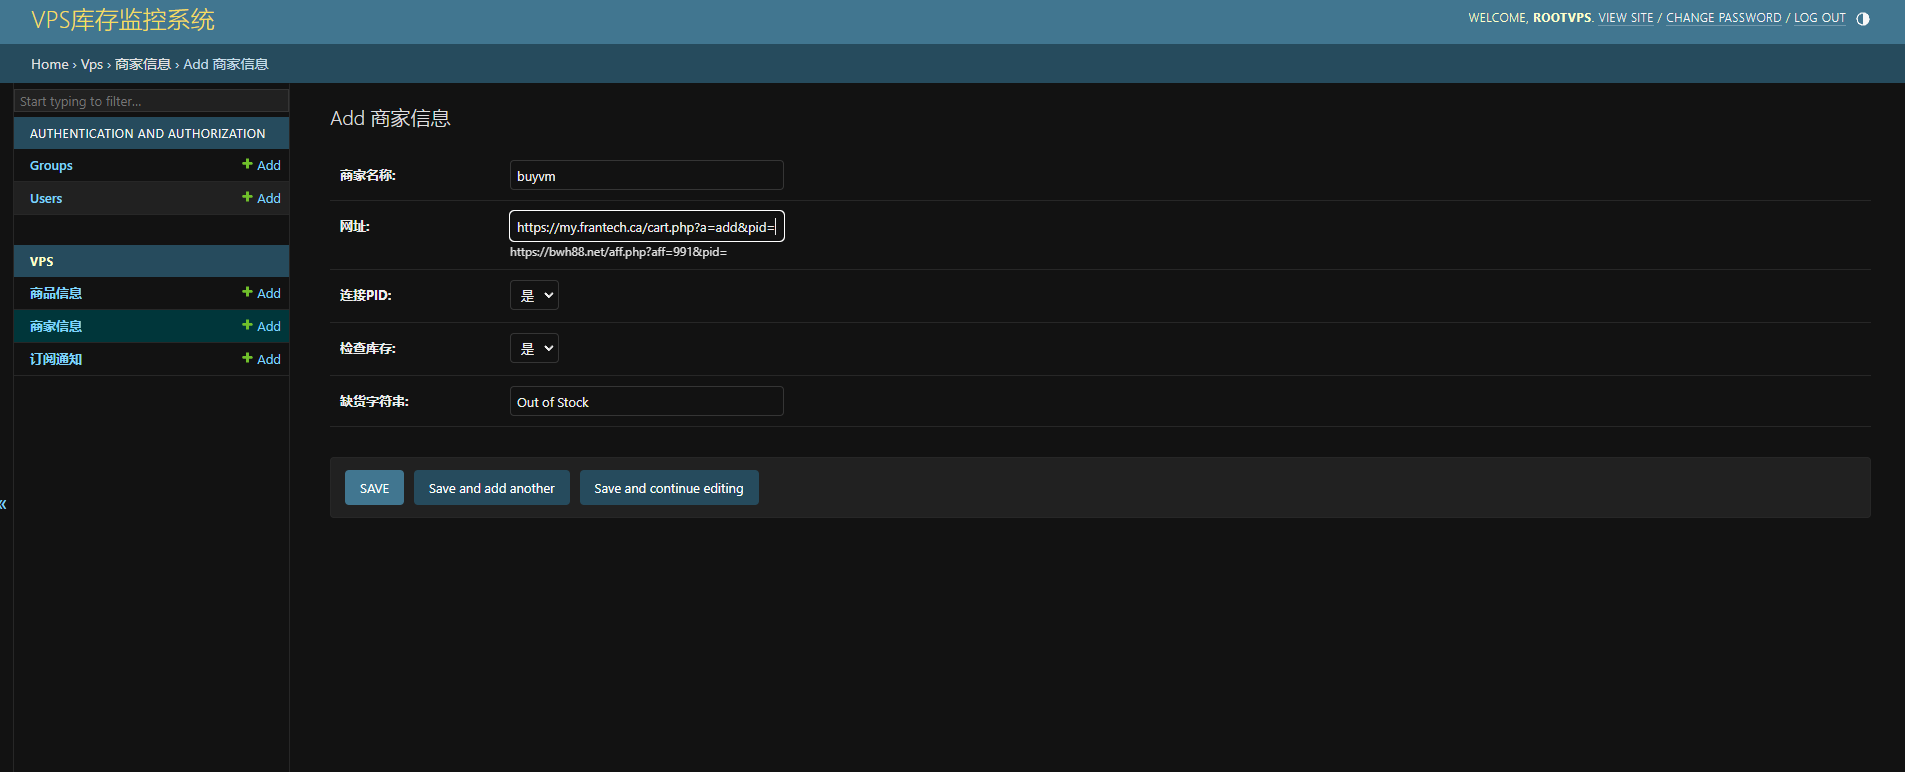
需要注意的是,我们只需要 https://my.frantech.ca/cart.php?a=add&pid= 这一段,并不需要 pid= 后的1423
添加商品信息
根据上文的 pid=1423 以及地区、线路进行填写,配置如图所示
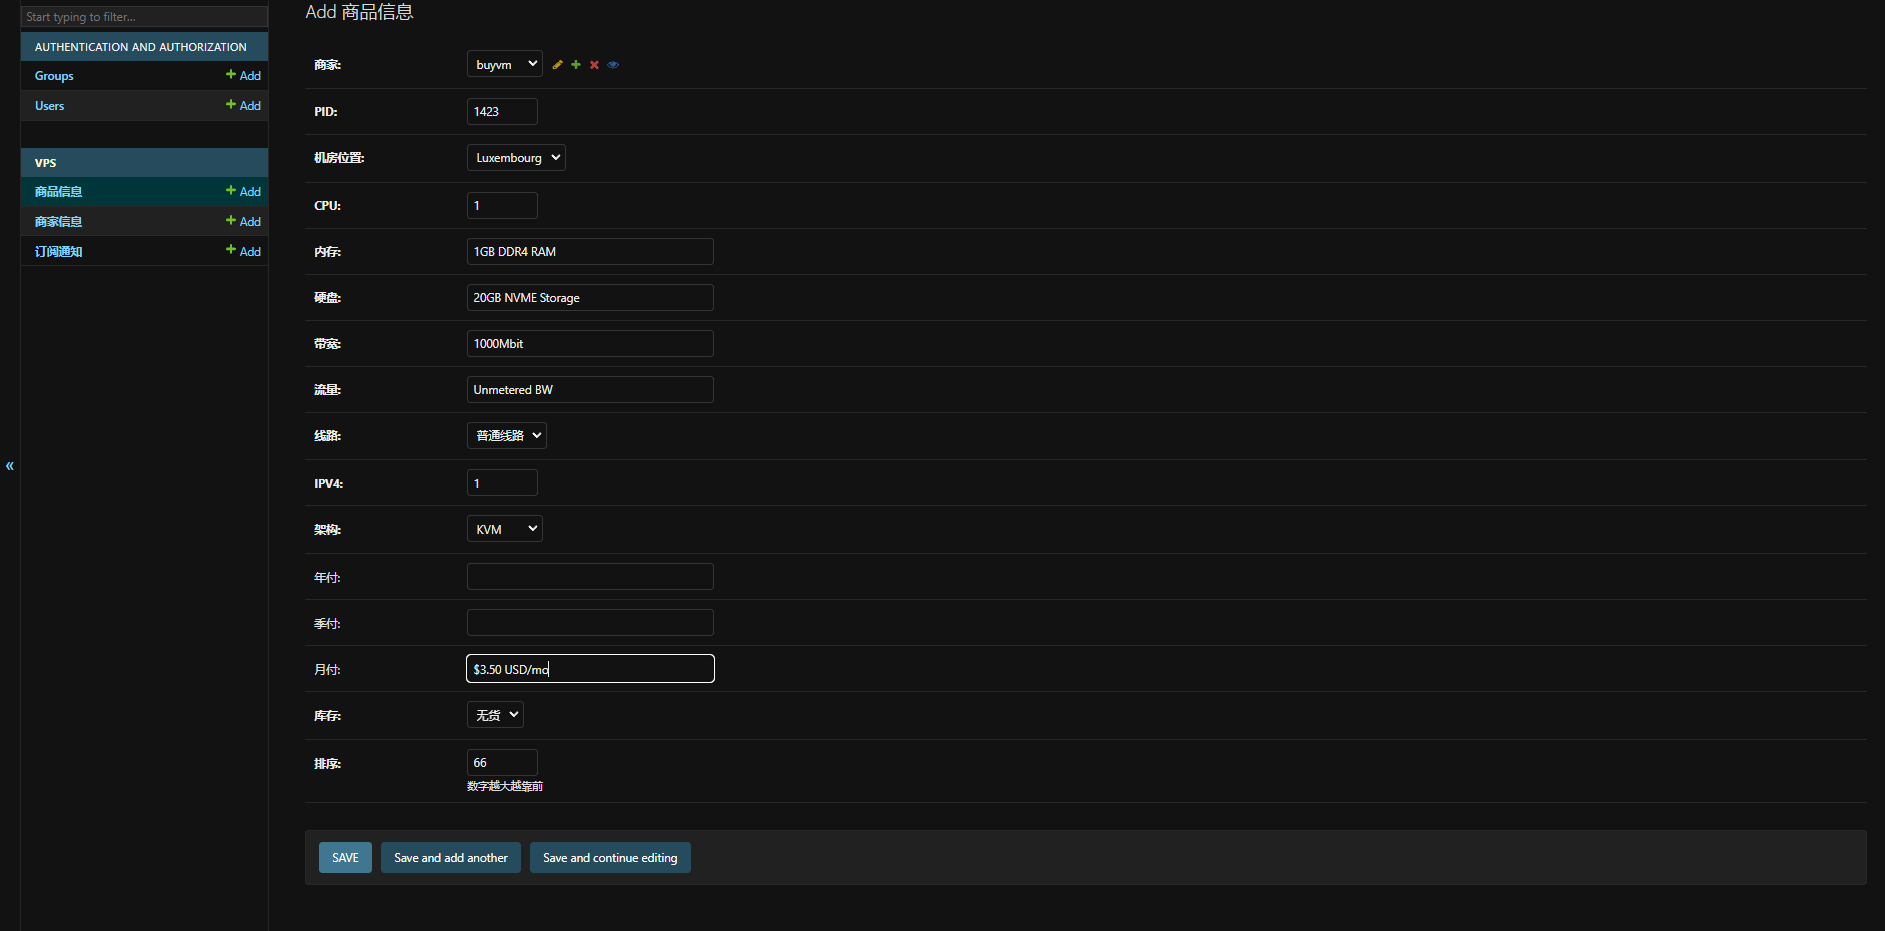
保存之后,我们回到首页进行查看 http://192.168.1.1:8558/
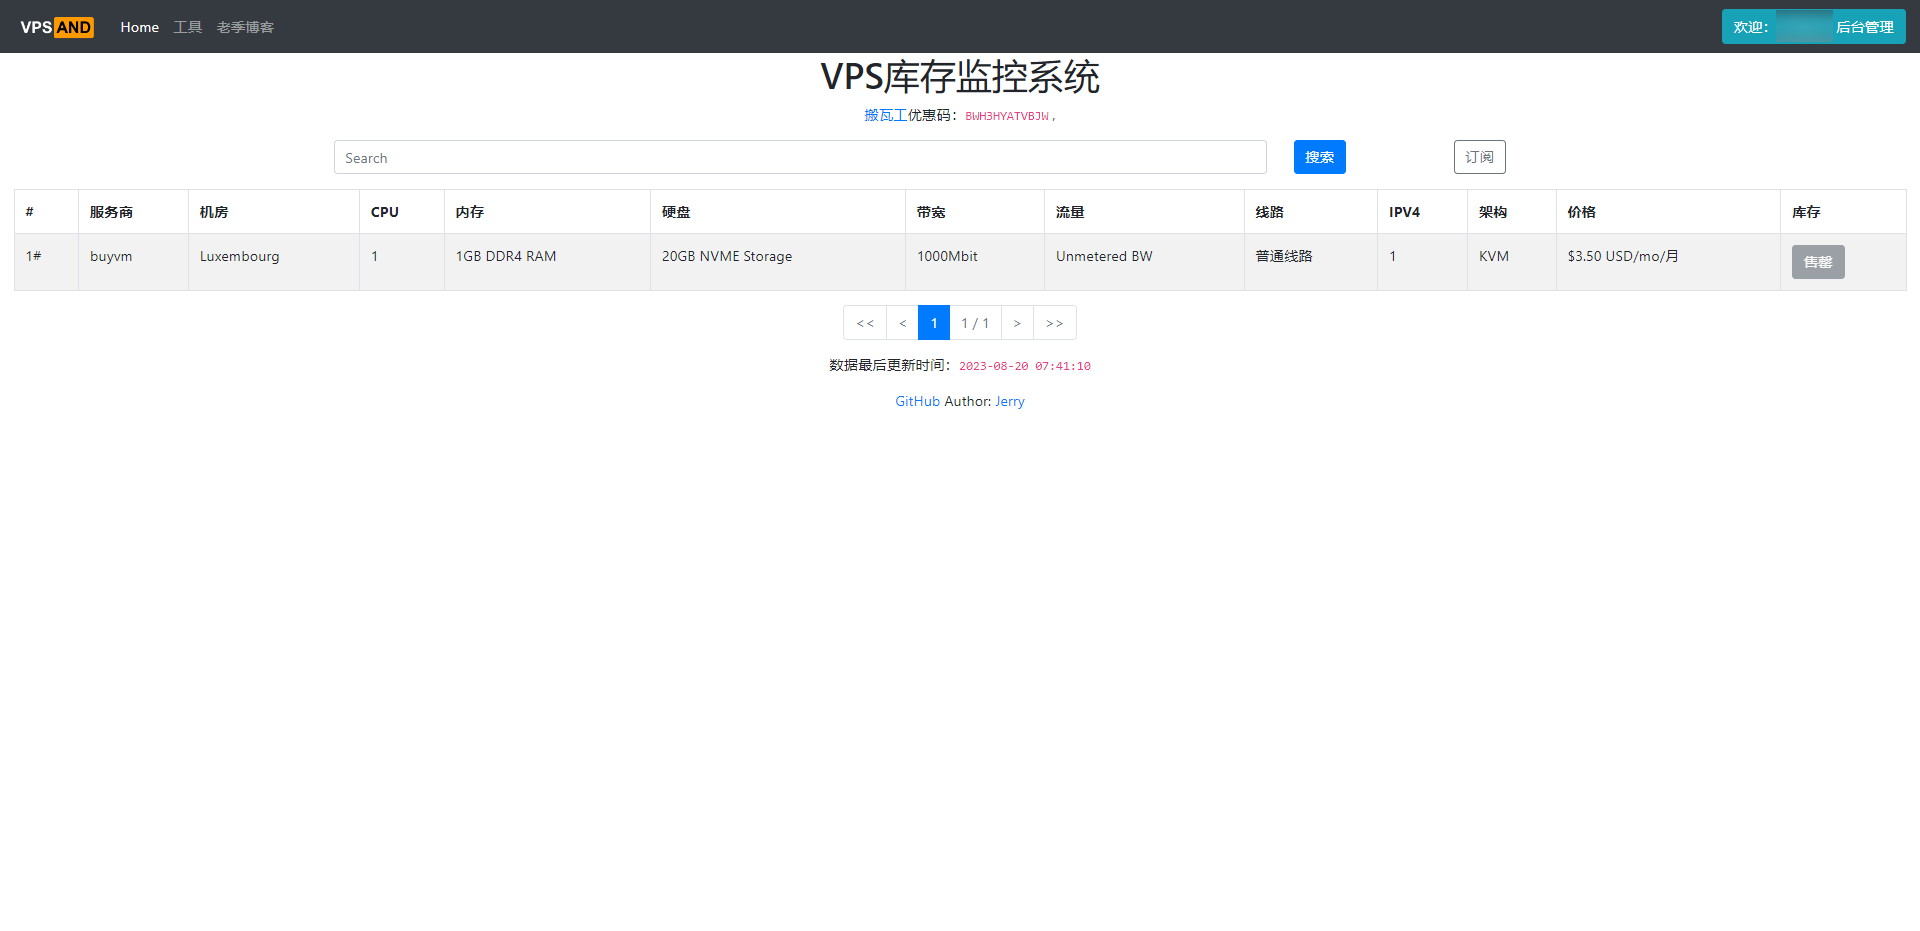
这样就代表已经配置完成了
补货通知
后台支持订阅通知,但我目前还并没有用到这个功能,所以暂时先不写了.
更新:稍微看了一下,文档说的很清楚了,只需要修改一下settings.py这个文件就好
nano /root/vpsand.com/vpsmonitor/settings.py
搜索 邮箱配置文件 这几个关键字即可,然后根据smtp常规配置进行操作即可,配置详情如下
'''
邮箱配置文件
'''
EMAIL_USE_SSL = True
EMAIL_HOST = 'smtp.163.com'  # 如果是 163 改成 smtp.163.com
EMAIL_PORT = 465
EMAIL_HOST_USER = 'laoji_org@163.com' # 帐号
EMAIL_HOST_PASSWORD = '邮箱密码'  # 密码
DEFAULT_FROM_EMAIL = EMAIL_HOST_USER
EMAIL_TIMEOUT = 12
也可以使用gmail的smtp服务,具体详情可以看一下我的上一篇帖子:https://www.nodeseek.com/post-17261-1
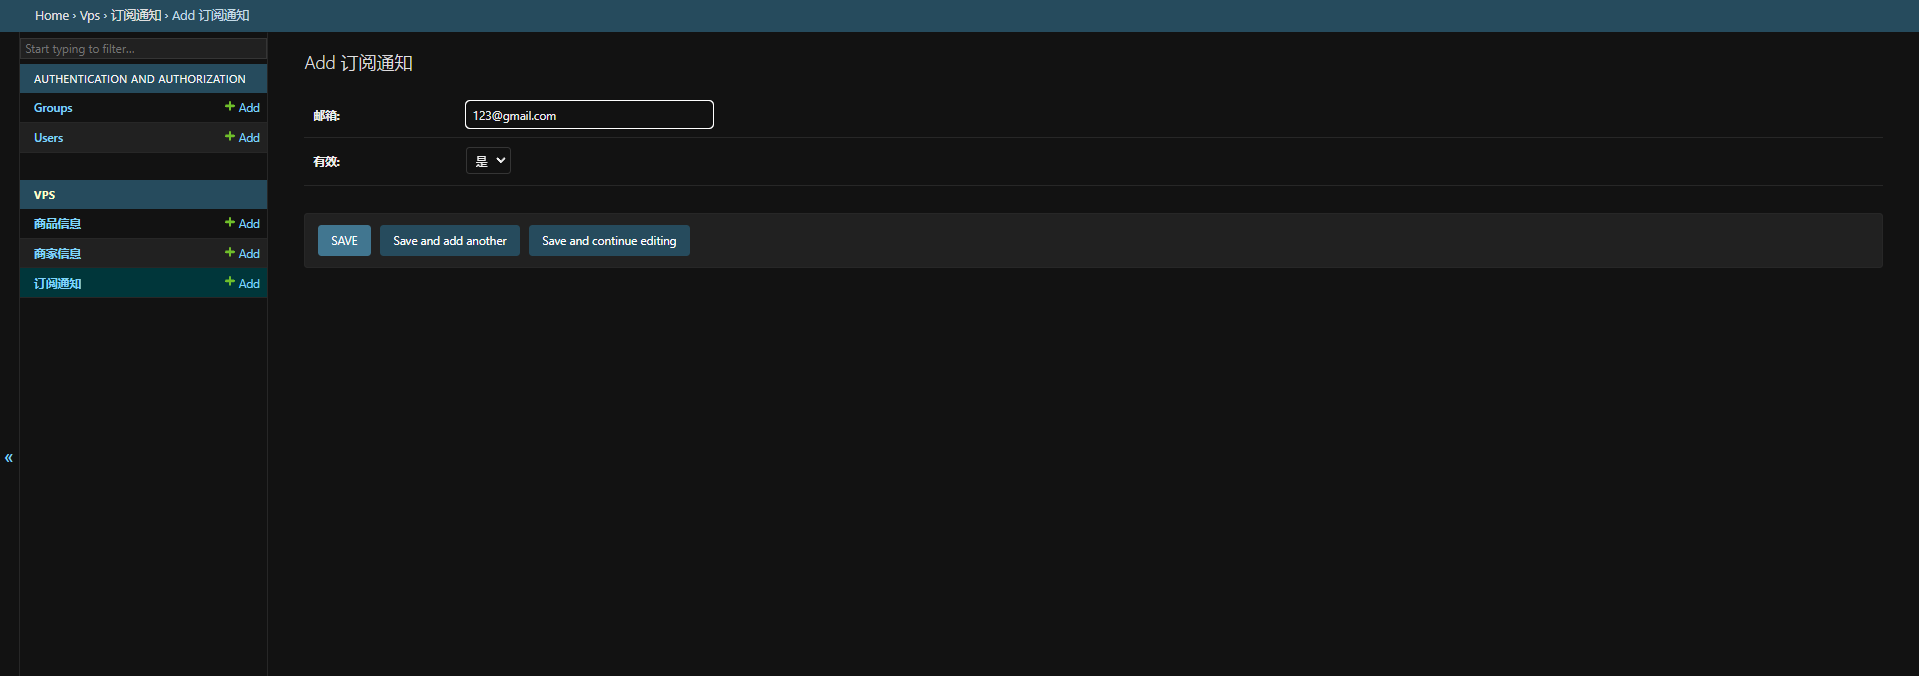
然后在后台管理面板的订阅通知这个选项添加你的邮箱即可,记得点击 SAVE
感谢
项目地址:https://github.com/qsbaq/vpsand.com
报错解决、定时任务:https://1024.ee/2020/06/26/自建vps库存监控系统-vps-ck-mk/
排名不分先后,感谢!
有什么写错的地方,欢迎指正.
以上全文转载自https://www.nodeseek.com/post-19948-1,作者


文章评论